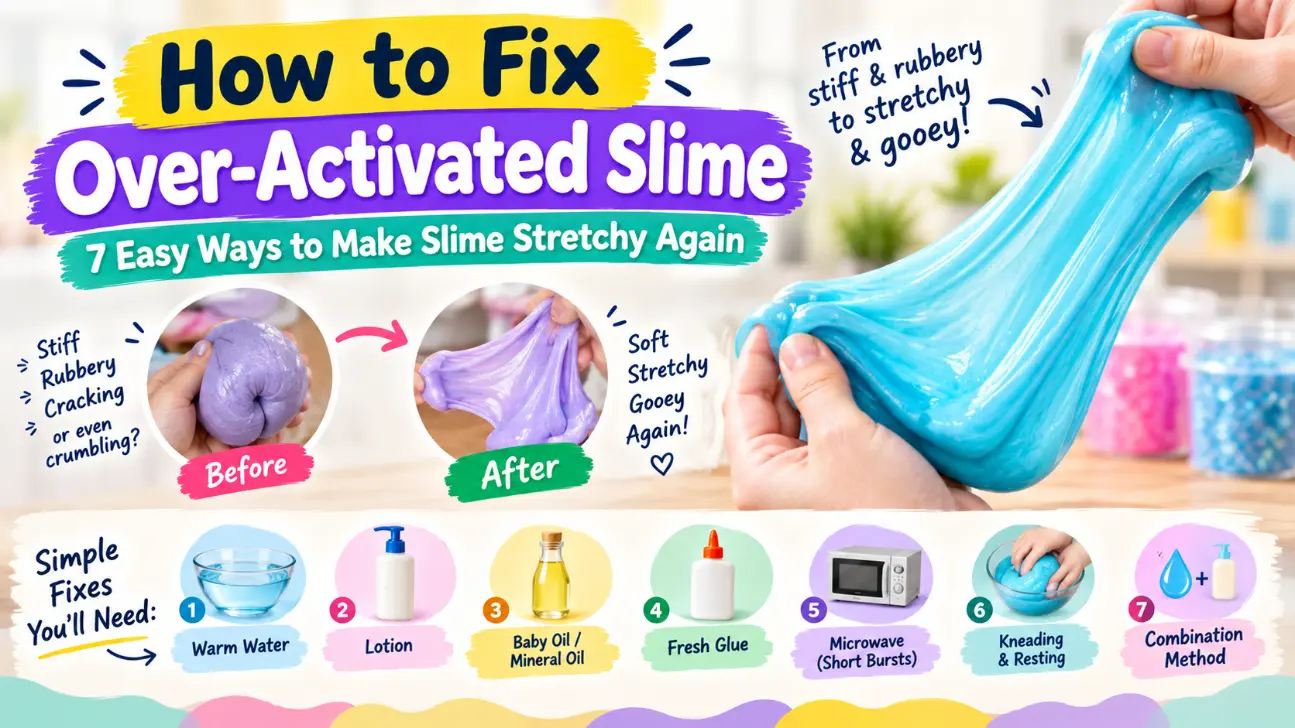
You added the activator, watched your slime come together and then it went too far. Instead of that satisfying stretchy, gooey texture, you’re left with something rubbery, stiff, or even cracking apart like clay.
If this sounds familiar, take a breath: over-activated slime is one of the most common problems in slime-making, and in almost every case, it’s completely fixable.
Whether you added too much activator, mixed too aggressively, or let it sit a little too long, the good news is that a few simple household items think warm water, lotion, or a touch of fresh glue can bring your slime back to life.
This guide walks through exactly why over-activation happens, how to identify it, and step-by-step methods to fix it at any severity level, from mildly stiff to seemingly ruined.
⚡ Quick Answer: How Do You Fix Over-Activated Slime?
The easiest starting point is warm water + lotion.
- 🥣 Submerge the slime in warm, not hot, water for 2–3 minutes.
- 🤲 Gently knead it underwater.
- 💧 Remove and gently squeeze out excess water.
- 🧴 Add a small amount of lotion.
- 👐 Knead it thoroughly.
- 🔍 Test the texture.
- 🔄 Repeat gradually if needed.
For severe cases, fresh glue may be needed to help rebalance the slime.
─────────────────────────
💡 QUICK TAKEAWAY: Start gently and add one fixing ingredient at a time. Don’t try to correct over-activated slime by adding more activator.
─────────────────────────
📌 Over-Activated Slime Fix at a Glance
| Slime Problem | First Fix to Try |
|---|---|
| Slightly stiff | 🤲 Hand-kneading |
| Mildly rubbery | 🧴 Lotion |
| Rubbery and resistant | 🥣 Warm water + lotion |
| Hard and cracking | 💧 Warm water + fresh glue |
| Clay-like | 🥣 Longer warm-water soak + fresh glue |
| Crumbling apart | 🔄 Multiple fixes or start fresh |
💡 Tip: Always test the slime after each small adjustment instead of adding several ingredients at once.
🧪 What Is Over-Activated Slime? (The Science Behind It)
To understand over-activation, it helps to know what’s actually happening chemically when you make slime.
Most slime recipes rely on a simple reaction between glue (a polymer) and an activator, such as borax solution, liquid starch, or saline solution containing boric acid or sodium borate.
When the activator is added, borate ions link the long polymer chains in the glue together, a process called cross-linking. This is what transforms runny glue into the stretchy, cohesive texture we recognize as slime.
⚖️ The Key Is Balance
The key to good slime is balance.
A moderate amount of cross-linking creates that ideal stretchy, slightly tacky consistency. But when too much activator is introduced, the cross-linking process goes into overdrive; the polymer chains bond too tightly and too extensively, squeezing out excess water and leaving behind a texture that’s dense, rubbery, or even brittle.
🆚 Firm Slime vs. Over-Activated Slime
This is different from simply “firm” slime.
Firm, well-activated slime should still stretch smoothly, hold its shape briefly, and feel pliable when kneaded.
Over-activated slime, by contrast, resists stretching, may crack or tear instead of pulling apart cleanly, and often feels more like rubber or hardened clay than a gooey substance.
🔬 Why the Fixes Work
Understanding this chemistry matters because it explains why the fixes that work aren’t random tricks; they specifically target the over-bonded polymer structure, either by reintroducing water and glue to loosen the cross-links or by adding oils and emollients to restore softness and glide.
─────────────────────────
💡 KEY TAKEAWAY: Over-activated slime has too much cross-linking, so the goal is to gradually restore moisture, softness, and balance.
─────────────────────────
🧴 Types of Activators and How Each Causes Over-Activation Differently
Not all activators behave the same way, and understanding your specific activator helps explain why your slime went too far and how best to fix it.
🧪 Borax Solution
Made by dissolving borax powder in warm water, this is one of the most common and potent activators.
Because it’s highly concentrated, even a small excess can rapidly over-activate slime, causing it to stiffen quickly and become rubbery within seconds of overmixing.
💧 Liquid Starch
A gentler activator than borax, liquid starch cross-links glue more gradually.
Over-activation still happens with excessive amounts, but it tends to produce a denser, less elastic texture rather than the hard, clay-like result borax can cause.
👁️ Saline Solution (Contact Lens Solution)
Saline solution activates slime only when it contains boric acid and sodium borate as ingredients not all brands do.
When it works, it tends to activate more slowly than borax, giving makers more control, though over-mixing after adding saline can still lead to a tough, rubbery texture.
🧴 Store-Bought “Slime Activator” Products
These are pre-formulated solutions designed specifically for slime-making, often balancing strength and control better than homemade borax mixtures.
However, their exact concentration varies by brand, so unfamiliar products can still cause unexpected over-activation if added too quickly.
Knowing which activator you used helps determine your fix: borax-based over-activation typically responds fastest to warm water and lotion, while starch-based over-activation may need slightly more kneading time to loosen.
─────────────────────────
💡 TIP: Always identify the activator you used before choosing a fix, because different activators can produce different textures.
─────────────────────────
👀 Signs and Symptoms of Over-Activated Slime
Before you can fix over-activated slime, it helps to confirm that’s actually the problem you’re dealing with.
Here are the clearest signs to watch for.
🏀 Rubbery, Bouncy-Ball Texture
Instead of stretching smoothly, the slime feels dense and springy, almost like a rubber ball.
When you press it, it bounces back immediately rather than holding an indentation.
💥 Cracking or Tearing When Stretched
Well-activated slime pulls apart into long, smooth strands.
Over-activated slime, by contrast, tends to crack, tear, or break into pieces the moment you try to stretch it, rather than stretching cleanly.
🧱 Hard, Clay-Like Feel
In more severe cases, the slime loses its gooey quality entirely and starts to feel firm and dense, closer to modeling clay than slime.
✨ Loss of Shine or Glossiness
Properly activated slime usually has a smooth, slightly glossy surface.
Over-activated slime often looks dull or matte, a visual cue that the polymer structure has tightened too much.
🚫 No Stickiness, Even When Fresh
While slime should lose stickiness as it activates, over-activated slime often has none at all right out of the bowl, which can indicate the process went too far too fast.
🫠 Doesn’t Self-Level or “Melt” Back Into a Puddle
Properly balanced slime, when left alone in a container, will slowly flatten or “melt” into a puddle over a few minutes.
Over-activated slime holds its shape rigidly and shows little to no movement.
🧩 Crumbling Into Pieces
In extreme cases, the slime may break apart into smaller chunks when handled instead of staying cohesive.
─────────────────────────
💡 IMPORTANT: If your slime is rubbery, cracks when stretched, or feels clay-like, avoid adding more activator.
─────────────────────────
⚠️ Root Causes: Why Slime Becomes Over-Activated
Understanding exactly why your slime went too far can help you avoid repeating the same mistake next time.
Most cases of over-activation trace back to one or more of these root causes.
1️⃣ Adding Activator Too Fast Without Mixing Time
The activator needs time to fully react with the glue before more is added.
Pouring in additional activators before the previous amount has had a chance to work often leads to over-activation, since it’s easy to misjudge how much is “enough” mid-process.
2️⃣ Adding Too Much Activator Overall
This is the most straightforward cause simply using more activator than the recipe calls for, often in an attempt to speed up the activation process or “fix” slime that seems too sticky.
3️⃣ Using a Too-Concentrated Activator Solution
A borax or saline mixture that’s stronger than intended (too much borax powder relative to water, for example) will activate glue more aggressively than expected, making over-activation more likely even with a “normal” amount added.
4️⃣ Over-Kneading After Activation
Continuing to knead slime well past the point it’s fully mixed can push the cross-linking process further, gradually squeezing out moisture and stiffening the texture over time.
5️⃣ Environmental Factors
Cold temperatures can cause slime to stiffen further, sometimes making already-firm slime feel over-activated even without additional activator being added.
6️⃣ Old or Expired Glue
Glue that’s past its prime or has started to dry out slightly reacts differently with activator, sometimes requiring less activator to reach the same firmness, which can catch makers off guard.
7️⃣ Skipping the “Test Small Amount First” Step
Adding all the activators at once instead of testing gradually removes the opportunity to stop before crossing into over-activated territory.
─────────────────────────
💡 KEY TAKEAWAY: The most common mistake is adding too much activator too quickly. Small additions and frequent texture checks give you much more control.
─────────────────────────
🛠️ The Complete Fix Toolkit
Once you’ve confirmed your slime is over-activated, these are the go-to methods for bringing it back, each targeting the problem slightly differently.
💧 Method 1: Warm Water Soak
Submerging slime in warm (not hot) water helps rehydrate the polymer chains, loosening the tight cross-linking that causes the stiffness.
This is often the first line of defense and works well for mild to moderate cases.
🧴 Method 2: Hand Lotion
Kneading in a small amount of lotion introduces emollients and moisture that restore glide and softness.
Lotion-based fixes tend to work gradually, so it’s best to add a little at a time.
🛢️ Method 3: Baby Oil or Mineral Oil
Oil coats the surface of the slime, softening its texture without reintroducing stickiness the way water sometimes can.
This method is especially useful for slime that’s become rubbery but not yet hard.
🧪 Method 4: Adding Fresh Glue
Since over-activation is essentially an imbalance between glue and activator, kneading in a small amount of fresh glue helps rebalance the ratio, restoring stretch and softness from the inside out.
♨️ Method 5: Microwave (Short Bursts)
Briefly warming slime in the microwave in short intervals can loosen its structure, though this method requires caution to avoid overheating or burning the slime.
🤲 Method 6: Massage and Kneading Alone
For very mild cases, simply kneading the slime by hand for several minutes can redistribute moisture and soften the texture without adding anything at all.
🔄 Method 7: Combination Approach
For severe cases, layering multiple methods such as a water soak followed by lotion often produces better results than any single method alone.
─────────────────────────
💡 TIP: Start with the gentlest method that matches your slime’s condition, then gradually move to stronger fixes only when needed.
─────────────────────────
📊 Severity-Based Fix Protocols
Not every over-activated batch needs the same treatment.
Matching your fix method to the severity of the problem saves time and prevents overcorrecting.
| Severity | What It Feels Like | Suggested Approach |
|---|---|---|
| 🟢 Mild | Slightly stiff, still somewhat stretchy | Hand-kneading |
| 🟡 Moderate | Rubbery but workable | Warm water + lotion or oil |
| 🟠 Severe | Hard, cracking, clay-like | Warm water + fresh glue |
| 🔴 Extreme | Crumbling or won’t hold together | Consider starting fresh |
🟢 Mild: Slightly Stiff, Still Somewhat Stretchy
If your slime is just a bit firmer than ideal but still pulls apart without cracking, start simple.
A few minutes of hand-kneading alone is often enough to redistribute moisture and soften the texture.
If that’s not quite enough, add a tiny dab of lotion and knead it in fully before deciding whether more is needed.
🟡 Moderate: Rubbery but Workable
When slime bounces back quickly and resists stretching but hasn’t started cracking, combine methods for better results.
Begin with a short warm water soak (2–3 minutes), then knead in a small amount of lotion or oil to restore softness and glide.
Test the texture after each addition rather than adding everything at once.
🟠 Severe: Hard, Cracking, Clay-Like
Slime that cracks when stretched or feels closer to clay than goo needs a more intensive approach.
Extend the warm water soak to 5–10 minutes, kneading periodically throughout.
Follow this with small additions of fresh glue, worked in gradually, to help rebalance the polymer structure.
This level often requires multiple rounds of soaking and kneading before the texture noticeably improves.
🔴 Extreme/Beyond Repair
If slime crumbles apart, won’t hold together even after extended soaking and multiple fix attempts, or has been over-activated for an extended period, it may be more efficient to start a fresh batch rather than continuing to invest time in fixing it.
─────────────────────────
💡 KEY TAKEAWAY: Match the repair method to the severity. Don’t jump to strong fixes when simple kneading or a small amount of lotion may be enough.
─────────────────────────
🧪 Detailed Step-by-Step Tutorial
This tutorial walks through the warm water + lotion combination method, which works for most mild-to-moderate cases and is the safest starting point for beginners.
🧺 What You’ll Need
- Your over-activated slime
- A bowl of warm (not hot) water
- Hand lotion (fragrance-free works best to avoid overpowering scents)
- A clean, dry surface for kneading
1️⃣ Submerge the Slime
Place your slime in the bowl of warm water and let it sit for 2–3 minutes.
You should notice it starts to soften slightly and feel less rigid to the touch.
2️⃣ Knead Underwater
While still in the water, gently knead and stretch the slime for another minute or two.
This helps water penetrate the polymer structure more evenly.
3️⃣ Remove and Drain
Lift the slime out and gently squeeze out excess water over the bowl.
Don’t wring it aggressively; a gentle press is enough.
4️⃣ Add a Small Amount of Lotion
Place the slime on your dry surface and knead in about a dime-sized amount of lotion.
Work it in fully before adding more.
5️⃣ Test the Texture
Stretch the slime slowly.
It should pull apart smoothly without cracking.
If it’s still too stiff, repeat Step 4 with another small amount of lotion.
6️⃣ Rest and Retest
Let the slime sit for 5 minutes, then test again.
The texture often continues to improve slightly after resting.
🔧 Troubleshooting
If after two full rounds there’s no improvement, move to the severe-case protocol with fresh glue.
─────────────────────────
💡 IMPORTANT: Add lotion gradually. Testing the texture after each small addition helps prevent turning over-activated slime into overly soft or greasy slime.
─────────────────────────
🔬 Ingredient-by-Ingredient Deep Dive: What Each Fix Actually Does
Understanding why each fixed ingredient works helps you troubleshoot more effectively and choose the right combination for your specific batch.
💧 Water: Rehydrates and Loosens Polymer Bonds
Over-activation squeezes excess water out of the slime’s polymer network as cross-linking tightens.
Warm water reintroduces moisture, gently loosening those bonds and making the structure more pliable again.
Warm (not hot) water is key; heat that’s too high can degrade the polymer structure further rather than helping it.
🧴 Lotion: Adds Emollients That Restore Glide and Softness
Lotion contains moisturizing agents and light oils that coat the polymer chains, reducing friction between them.
This restores the smooth, glide-like quality that stretchy slime needs, without significantly altering its chemical structure.
🛢️ Oil: Coats and Softens Without Adding Stickiness
Unlike water, oil doesn’t get absorbed into the polymer network; instead, it sits on the surface and between strands, softening texture and improving stretch while helping the slime remain non-sticky, which makes it a good choice when you want to avoid a tacky result.
🧪 Glue: Reintroduces Polymer Chains to Rebalance the Ratio
Since over-activation is fundamentally a ratio problem (too much activator relative to glue), adding a small amount of fresh glue directly addresses the imbalance, reintroducing looser polymer chains that dilute the over-cross-linked structure.
🚫 Why More Activator Never Fixes Over-Activation
A common misconception is that adding more activators will somehow “reset” the slime.
In reality, this only worsens the problem since over-activation is caused by excess activator to begin with, adding more simply increases the very cross-linking that’s causing the stiffness.
─────────────────────────
💡 KEY TAKEAWAY: Water, lotion, oil, and fresh glue each address stiffness differently, but more activator is never the solution to over-activation.
─────────────────────────
🛡️ Prevention: How to Avoid Over-Activation From the Start
The easiest fix for over-activated slime is never needing one in the first place.
These habits help you avoid the problem entirely.
🐢 The “Add Slowly, Test Often” Rule
Rather than pouring in the full amount of activator at once, add it in small increments a teaspoon or less at a time, mixing thoroughly and testing the texture after each addition.
This gives you full control and lets you stop the moment the slime reaches the ideal consistency.
⚖️ Proper Activator-to-Glue Ratios by Activator Type
Different activators require different ratios.
Borax solution typically needs less volume relative to glue than liquid starch, since it’s more concentrated.
Following a tested recipe for your specific activator type rather than guessing or eyeballing amounts significantly reduces the risk of over-activation.
🤲 Mixing Technique: Folding vs. Aggressive Stirring
Gently folding the activator into the glue, rather than stirring vigorously, allows you to monitor texture changes more closely and reduces the chance of accidentally overworking the slime.
🌡️ Ideal Room Temperature for Slime-Making
Slime activates more predictably at room temperature.
Very cold environments can make slime seem under-activated initially, tempting makers to add more activator than actually needed, which then over-activates as the slime warms up.
🔍 How to Test Consistency Before Declaring Slime “Done”
Stop adding activator as soon as the slime pulls away cleanly from the sides of the bowl and feels only slightly tacky; it will continue to firm up a bit more as you knead it by hand.
🫙 Storage Tips to Prevent Stiffening Over Time
Store finished slime in an airtight container in a cool, dry place, away from direct sunlight or heat, which can cause it to stiffen gradually even after it’s properly activated.
─────────────────────────
💡 TIP: The safest habit is simple: add activator slowly, mix thoroughly, and test before adding more.
─────────────────────────
❌ Common Mistakes When Attempting to Fix Slime
Even with the right methods, a few missteps during the fixing process can undo your progress or create new problems.
Here’s what to watch for.
🧴 Adding Too Much Lotion or Oil at Once
It’s tempting to add a generous amount of lotion or oil hoping for a faster fix, but overdoing it can leave slime feeling greasy or slick rather than stretchy.
This buildup can also make the slime harder to work with, since excess oil sits on the surface rather than absorbing evenly.
Always add small amounts incrementally, testing texture between additions.
♨️ Using Hot Water Instead of Warm
Water that’s too hot can degrade the slime’s polymer structure rather than gently loosening it, sometimes making the texture worse or causing the slime to break down unevenly.
Lukewarm to warm water is sufficient and far safer for the fixing process.
🤲 Over-Kneading During the Fix Process
Just as over-kneading during the original activation process can cause stiffening, continuing to knead slime aggressively while fixing it can reintroduce the very problem you’re trying to solve.
Knead just enough to work in each addition, then stop and test.
⚖️ Skipping Gradual Testing and Overcorrecting
Adding several fixed ingredients at once without testing in between makes it easy to overcorrect, turning over-activated slime into slime that’s now too soft or sticky.
Patience and incremental testing produce far more reliable results.
🧪 Mixing Incompatible Fix Methods Carelessly
Combining oil and water-based fixes without allowing each to fully absorb can create an uneven, separated texture rather than a smooth, unified fix.
Let one method fully work before layering on another.
─────────────────────────
💡 IMPORTANT: Fixing slime is a gradual process. Add one ingredient at a time and test the texture before making another change.
─────────────────────────
🔄 When to Start Over Instead of Fixing
Sometimes the most efficient choice isn’t fixing your slime at all, it’s starting fresh.
Here’s how to know when that’s the better call.
🚫 Objective Signs Slime Is Unsalvageable
If your slime crumbles into small pieces rather than holding together, doesn’t respond at all after multiple rounds of soaking and kneading, or has developed a dry, crusty texture throughout, it’s likely reached a point where fixing isn’t worth the effort.
Slime that’s been over-activated for days or weeks, allowing it to fully dry out, is especially unlikely to recover.
⏱️ Time/Cost Trade-Off of Fixing vs. Remaking
Fixing severely over-activated slime can take multiple rounds of soaking, kneading, and testing, sometimes stretching over 20–30 minutes with uncertain results.
In comparison, mixing a fresh batch with correct ratios often takes less time and guarantees a better outcome.
If you find yourself on your third or fourth fix attempt with minimal improvement, it’s usually more efficient to start over.
♻️ Creative Ways to Repurpose Unfixable Slime
Even slime that can’t be restored to its original stretchy form doesn’t have to go to waste.
Consider:
- Stress balls: firm, rubbery slime can be rolled into a ball and used as a hand-squeezing stress reliever
- Sensory bins: broken or crumbled slime pieces can be repurposed as a tactile filler for sensory play
- Textured craft slime: intentionally embracing the firmer texture as a “crunchy” or textured slime variant, which some slime enthusiasts actually prefer
Knowing when to let go saves time, reduces frustration, and turns a “failed” batch into something still useful.
─────────────────────────
💡 KEY TAKEAWAY: If several gradual repair attempts produce little or no improvement, starting fresh may save more time than continuing to fix the batch.
─────────────────────────
🧈 Special Cases
Certain slime types behave differently when over-activated, and standard fixes sometimes need slight adjustments to work properly.
🧈 Fixing Over-Activated Butter Slime
Butter slime already contains clay or modeling foam, giving it a naturally thicker, less glossy texture than basic slime.
When over-activated, it tends to feel dense and crumbly rather than rubbery.
Because the clay component absorbs moisture differently than plain glue-based slime, warm water soaks should be shorter (1–2 minutes) to avoid making the clay portion dissolve or become mushy.
Lotion tends to work especially well here, since it softens without adding excess water.
☁️ Fixing Over-Activated Clay/Foam Slime
Similar to butter slime, foam or clay-based slimes can become stiff and grainy when over-activated.
Kneading in a small amount of lotion combined with light water misting (rather than a full soak) often works better than submerging, since these slimes can break down if left in water too long.
✨ Fixing Glitter or Glow-in-the-Dark Slime Without Losing Added Effects
When fixing slime with mix-ins like glitter or glow-in-the-dark powder, avoid aggressive water soaking, which can cause these additives to separate or clump unevenly.
Instead, favor gentler methods like lotion or oil, kneading carefully to redistribute the glitter or glow powder evenly as you work in the fix.
⏳ Fixing Slime That’s Been Over-Activated for a Long Period
Slime left over-activated for days or weeks often dries out further over time.
These cases typically need an extended warm water soak (10+ minutes, possibly repeated) combined with multiple small additions of fresh glue, since simple lotion or oil fixes are rarely enough to reverse significant moisture loss.
─────────────────────────
💡 TIP: Specialty slimes may need gentler fixes because clay, foam, glitter, and other additives can change how the slime responds.
─────────────────────────
❓ FAQs
Can Over-Activated Slime Be Fixed?
Yes, in almost all cases. Mild to moderate over-activation typically responds well to warm water soaks and lotion, while more severe cases may need fresh glue and multiple fix rounds.
What Household Items Fix Over-Activated Slime?
Warm water, hand lotion, baby oil, and fresh glue are the most effective and commonly available fixes. Most slime-makers already have at least one of these on hand.
Why Did My Slime Become Hard and Rubbery Overnight?
This usually happens when too much activator was used, the slime was over-kneaded, or it sat somewhere cold, which can stiffen the polymer structure further over time.
Does Lotion Really Work on Slime, and Which Kind Is Best?
Yes, lotion’s emollients restore glide and softness. Fragrance-free, basic lotions work best, since heavily scented or thick lotions can leave slime feeling greasy.
How Long Should I Soak Slime in Warm Water?
Start with 2–3 minutes for mild cases, extending to 5–10 minutes for severe cases. Always knead periodically during the soak.
Can You Over-Fix Slime and Make It Too Soft or Sticky?
Yes. Adding too much lotion, oil, or water without testing in between can overcorrect the texture, making slime too soft or tacky. Add fixes gradually.
Is Over-Activated Slime Safe to Keep Fixing Repeatedly?
Generally yes, though each fixed round adds moisture and ingredients that slightly change the slime’s original texture, so results may vary the more times it’s reworked.
─────────────────────────
💡 QUICK ANSWER: Start with warm water and gradual kneading for mild cases, then add small amounts of lotion or fresh glue if needed.
─────────────────────────
🏁 Conclusion
Over-activated slime might feel like a frustrating dead end, but as this guide has shown, it’s almost always fixable with a few simple household items and a little patience.
Whether your batch is just slightly stiff or has crossed into hard, clay-like territory, matching the right method of warm water, lotion, oil, or fresh glue to the severity of the problem makes all the difference.
More than anything, remember that slime-making is trial and error, not a science you need to get perfect on the first try.
The real secret isn’t just fixing over-activated slime, it’s adding activators slowly and testing often next time, so you spend more time playing with your slime and less time repairing it.
⚠️ Safety Note
Keep slime away from eyes and mouth, wash hands after handling it, and supervise young children during slime-making and play.
Follow the safety directions for any activator or household product you use.