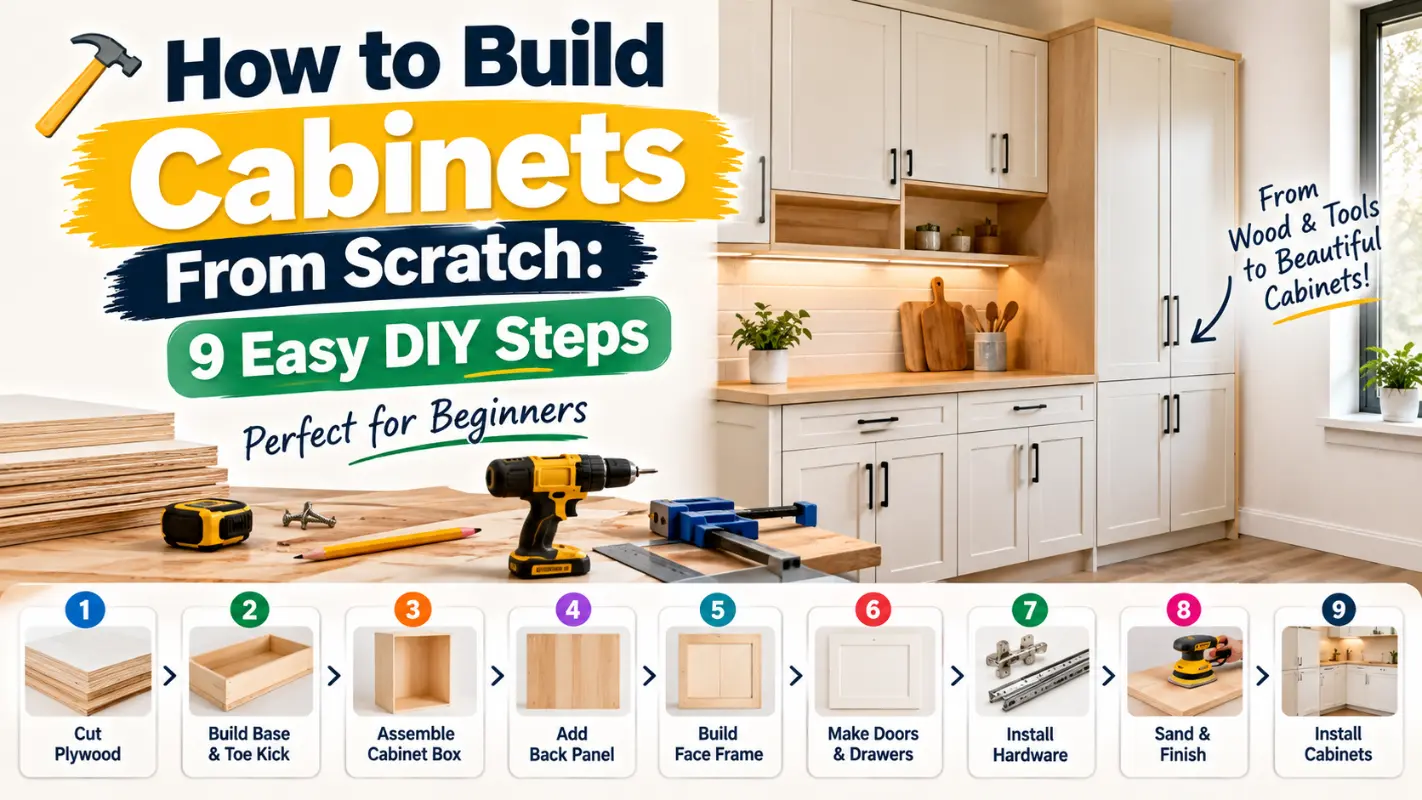
Building your own cabinets is one of the most rewarding DIY projects you can take on and it’s more approachable than it looks.
At its core, a cabinet is essentially a plywood box, and once you understand that basic construction method, it scales to kitchens, bathrooms, workshops, and built-ins throughout your home.
Beyond the satisfaction of building something yourself, DIY cabinets can offer real savings compared to pre-made or custom cabinetry, along with the ability to build exactly to your space and specifications rather than settling for standard sizing.
This guide walks through the entire process: planning your project and choosing a cabinet style, selecting materials and tools, cutting and assembling the cabinet box, building doors and drawers, installing hardware, finishing, and finally installing your cabinets in their permanent home.
If you’re a first-time DIYer or an experienced woodworker, you’ll find a clear, complete path from empty space to finished cabinetry.
⚡ Quick Answer: How Do You Build Cabinets?
The basic cabinet-building process is:
Plan → Measure → Choose a Style → Gather Materials → Cut Plywood → Build the Base → Assemble the Cabinet Box → Add the Back Panel → Build Doors & Drawers → Install Hardware → Sand & Finish → Install Cabinets
🪚 AT A GLANCE
Difficulty: Beginner to Intermediate
Main Material: ¾-inch furniture-grade plywood
Basic Tools: Circular saw or table saw, drill/driver, measuring tools, clamps
Common Styles: Face frame and frameless
Best Beginner Option: Frameless/slab-style cabinets
Main Priorities: Accurate measurements, square cuts, and careful assembly
📋 Cabinet-Building Checklist
Before you start, make sure you’ve planned these essentials:
- ☐ Measure your space
- ☐ Sketch your cabinet layout
- ☐ Choose face frame or frameless construction
- ☐ Create a complete cut list
- ☐ Calculate your material requirements
- ☐ Set your project budget
- ☐ Gather plywood and hardware
- ☐ Prepare your tools
- ☐ Plan your doors and drawers
- ☐ Decide on your finish
- ☐ Plan the installation
💡 IMPORTANT
Don’t rush into cutting plywood. Good planning is one of the biggest factors separating a smooth cabinet build from a frustrating one.
🗂️ Planning Your Cabinet Project
Good planning is the single biggest factor separating a smooth cabinet build from a frustrating one. Rushing past this stage to get to the “fun part” of cutting wood is one of the most common beginner mistakes.
📏 Measuring Your Space Accurately
Start by measuring the exact space where your cabinets will go width, height, and depth, accounting for any obstacles like outlets, pipes, or uneven walls.
Measure twice, and if possible, have a second person double-check your numbers, since an error here compounds through every later step.
📐 Standard Cabinet Dimensions
While your specific space may call for custom sizing, it helps to know typical benchmarks.
| Cabinet Type | Typical Depth | Typical Height |
|---|---|---|
| Base cabinets | 24 inches | About 36 inches including countertops |
| Wall cabinets | 12 inches | Varies by ceiling height and design |
✏️ Sketching Your Layout
Before cutting any material, sketch out your full cabinet layout, including where each cabinet will sit, appliance placement, and any awkward corners or transitions.
Even a simple hand-drawn sketch with measurements noted can prevent costly mistakes once you’re mid-build.
🔢 Calculating How Many Cabinets You Need
Using your layout and standard cabinet sizing, work out how many base cabinets, wall cabinets, and any specialty units (corner cabinets, pantry units) your space requires.
💰 Setting a Realistic Budget
Factor in plywood, hardware, finishing supplies, and any tools you’ll need to purchase or rent.
Building your own budget spreadsheet before starting helps you avoid surprises partway through the project and gives you a clear number to compare against pre-made cabinet pricing later.
📌 KEY TAKEAWAY
Measure twice, plan your layout carefully, and create your cut list before buying or cutting materials.
🎨 Choosing a Cabinet Style
Before cutting any wood, decide which basic cabinet style you’re building. This choice affects your material list, construction complexity, and overall timeline.
🪵 Face Frame Cabinets
This is the more traditional cabinet style, especially popular in North America.
A face frame is a solid wood frame attached to the front opening of the plywood box, providing extra rigidity and a more classic, finished appearance.
Face frame cabinets typically require additional material (solid wood for the frame itself) and additional construction time, since the frame needs to be built separately and precisely fitted to the box.
📦 Faceless (European-Style) Cabinets
Also called frameless cabinets, this style skips the face frame entirely, with doors and drawers attaching directly to the plywood box.
This approach is generally considered easier and faster for beginners, since it eliminates an entire construction step and reduces material costs.
It also tends to offer slightly more interior storage space, since there’s no frame reducing the cabinet opening.
⚖️ Pros and Cons of Each
| Feature | Face Frame | Faceless |
|---|---|---|
| Appearance | Traditional | Modern/minimalist |
| Construction | More involved | Simpler |
| Materials | More | Less |
| Build time | Longer | Faster |
| Beginner-friendly | Moderate | Easier |
Face frame cabinets offer a more traditional look and added structural rigidity, but cost more in materials and time.
Faceless cabinets are simpler, faster, and often more budget-friendly, but have a more modern, minimalist aesthetic that may not suit every kitchen or design style.
🧰 Which Style Suits Your Skill Level and Goals?
If this is your first cabinet-building project, faceless cabinets offer a more forgiving entry point with fewer opportunities for fit issues.
If you have some woodworking experience and want a more traditional look, face frame cabinets are a very achievable next step, just with a longer build timeline.
🪚 TIP
If you’re building cabinets for the first time, faceless cabinets offer a more forgiving entry point with fewer construction steps.
🧰 Materials and Supplies
Choosing the right materials upfront makes a real difference in both how your finished cabinets look and how long they last.
🌳 Plywood Types and Grades
Most DIY cabinets are built from ¾-inch furniture-grade plywood, which strikes a good balance of strength, workability, and cost.
Maple plywood offers a smooth, attractive surface that takes paint and stain well.
Baltic birch plywood is prized for its many thin, void-free layers, giving it exceptional strength and clean edges, a popular choice for higher-end builds.
Pine plywood is a more budget-friendly option, well-suited to painted finishes or workshop-style cabinets where a premium look isn’t the priority.
MDF (medium-density fiberboard) is another affordable, smooth option, particularly popular for painted cabinet doors, though it’s heavier and less moisture-resistant than plywood.
📏 Choosing Plywood Thickness for Different Parts
| Cabinet Part | Suggested Material |
|---|---|
| Structural components | ¾-inch plywood |
| Cabinet sides | ¾-inch plywood |
| Cabinet bottoms | ¾-inch plywood |
| Shelves | ¾-inch plywood |
| Base cabinet backs | Around ¼-inch plywood |
| Wall cabinet backs | Up to ½-inch plywood |
🔩 Hardware Needed
Stock up on hinges, drawer slides, and appropriate screws (including pocket-hole screws if using that joinery method) before starting assembly, so you’re not pausing mid-build to make a hardware run.
🪵 Solid Wood for Face Frames and Doors
If building face frame cabinets or frame-and-panel doors, you’ll need solid wood strips in addition to your plywood.
🎨 Finishing Supplies
Plan for sandpaper (multiple grits), primer, and your chosen paint, stain, or clear sealant.
📌 IMPORTANT
Choose your plywood, hardware, and finishing supplies before beginning the build so you don’t have to stop halfway through the project.
🔧 Tools You’ll Need
You don’t need a fully outfitted woodworking shop to build cabinets, but having the right tools on hand makes the process significantly smoother and more accurate.
🛠️ Essential Tools
A circular saw or table saw is necessary for breaking down plywood sheets and cutting pieces to size.
A table saw offers more precision for repeated cuts, but a circular saw with a good guide works perfectly well for beginners.
A drill/driver handles everything from pilot holes to driving screws during assembly.
Accurate measuring tools, a tape measure, combination square, and a reliable pencil are essential for keeping cuts and layouts precise throughout the build.
➕ Helpful Additions
A pocket-hole jig (like a Kreg Jig) makes joining plywood pieces fast and strong without needing advanced joinery skills.
A straight-edge guide clamped to your plywood keeps circular saw cuts clean and square.
Clamps help hold pieces steady and aligned during assembly and glue-up.
⚡ Optional Power Tools That Speed Up the Process
A brand nailer or nail gun speeds up attaching back panels and trim, while a random orbital sander makes the finishing stage far less tedious than hand-sanding.
🥽 Safety Equipment
Safety glasses, hearing protection (especially with power tools running for extended periods), and a dust mask are all worth having on hand.
Cabinet building involves a fair amount of cutting and sanding, and protecting yourself from dust and debris is worth the minor inconvenience.
⚠️ SAFETY TIP
Always use appropriate eye, hearing, and dust protection when cutting, sanding, or operating power tools.
🛠️ Step-by-Step: How to Build Cabinets
📍 BUILD ROADMAP
1. Cut Plywood → 2. Build Base & Toe Kick → 3. Assemble Box → 4. Add Back Panel → 5. Build Face Frame → 6. Build Doors & Drawers → 7. Install Hardware → 8. Sand & Finish → 9. Install Cabinets
1️⃣ Step 1: Cutting Your Plywood
With materials and tools ready, the build itself begins with breaking down your plywood into the individual pieces that will become your cabinet.
Breaking Down Full Sheets Into Workable Pieces
A full sheet of plywood (typically 4 feet by 8 feet) is large and unwieldy to maneuver on a table saw alone.
Start by using a circular saw to rough-cut the sheet into smaller, more manageable sections before moving to precise, final-dimension cuts.
This two-stage approach is a rough cut, then a precise cut is safer and more accurate than trying to wrangle a full sheet through every cut.
Cutting Side Panels, Bottoms, and Base/Brace Pieces to Dimension
Using your planned measurements from earlier, cut your side panels, bottom pieces, and any base or brace components.
Work from a cut list you’ve prepared in advance, and double-check each measurement before cutting rather than relying on memory as you go.
Using a Straight-Edge Guide for Clean, Square Cuts
Clamp a straight-edge guide to your plywood sheet before cutting with a circular saw.
This single habit dramatically improves cut accuracy compared to free-handing a cut, and it’s one of the most commonly cited tips across experienced cabinet builders for good reason; a slightly crooked cut at this stage creates fitting problems throughout the rest of assembly.
Common Cutting Mistakes to Avoid
Skipping the straight-edge guide, cutting without double-checking measurements, and not accounting for saw blade width (kerf) in your cut list are among the most frequent errors that throw off an otherwise well-planned build.
✂️ KEY TAKEAWAY
Measure twice, account for saw kerf, and use a straight-edge guide whenever possible for accurate plywood cuts.
2️⃣ Step 2: Building the Cabinet Base and Toe Kick
Base cabinets need a specific structural feature before the main box comes together: a toe kick, the recessed space at the very bottom that lets you stand close to the cabinet comfortably.
What a Toe Kick Is and Why It Matters
Without a toe kick, you’d have to lean forward awkwardly every time you stood at a counter or sink, since your feet would have nowhere to go but directly under the cabinet face.
This small recessed gap typically a few inches deep and a few inches tall solves that problem and has become a standard feature of virtually all base cabinetry.
Method 1: Cutting Notches Into Side Panels
One approach is cutting a notch directly into the bottom-front corner of each side panel, creating the toe kick recess as part of the panel itself.
This keeps material use efficient but requires precise, careful cutting to get the notch dimensions consistent across multiple cabinets.
Method 2: Building a Separate 2×4 Base
Alternatively, many builders construct a standalone base frame out of 2×4 lumber, sized to the cabinet’s footprint, then set the plywood box on top of it.
This method is often easier to level during installation and saves plywood material, making it a popular choice among builders working on multiple cabinets at once.
Differences for Base vs. Wall Cabinets
Wall cabinets don’t need a toe kick at all, since they’re mounted above counter height rather than sitting on the floor so this entire step can be skipped when building upper cabinets.
💡 TIP
Toe kicks are relevant to base cabinets, while wall cabinets can skip this step because they are mounted above the floor.
3️⃣ Step 3: Assembling the Cabinet Box
With your pieces cut and your base prepared (if applicable), it’s time to bring everything together into the core structure of your cabinet.
Attaching Side Panels to the Bottom
Begin by joining your two side panels to the bottom piece, forming the basic U-shape of the cabinet box.
Take care to keep everything square at this stage; an out-of-square box creates cascading fit problems for every component that attaches later, including doors, drawers, and face frames.
Adding Top Braces/Stretchers
Rather than a full plywood panel across the top, most cabinets use a few narrow strips of plywood typically around 3 inches wide running across the top front and back.
These stretchers add structural rigidity to the box and, importantly, give you a solid surface to screw into later when securing the cabinet to wall studs during installation.
Pocket-Hole Joinery Basics
Pocket-hole joinery has become one of the most popular methods for DIY cabinet assembly, and for good reason.
Using a pocket-hole jig, you drill angled holes that allow screws to join two pieces of plywood strongly and relatively invisibly, without needing more advanced joinery skills like dovetails or dados.
This method is fast, forgiving for beginners, and plenty strong for cabinet-grade construction.
Ensuring Square, Accurate Assembly
Use a combination square or measure diagonally corner-to-corner (equal diagonal measurements confirm a square box) as you assemble.
Clamping pieces in place before driving screws helps keep everything aligned and prevents shifting mid-assembly.
📐 IMPORTANT
Check that the cabinet box is square before permanently securing the assembly.
4️⃣ Step 4: Adding the Back Panel
With your cabinet box assembled, the next step is attaching a back panel to a component that does more structural work than its simplicity might suggest.
Choosing Back Panel Thickness
Back panels don’t need to be as thick as your structural plywood.
A common approach uses around ¼-inch plywood for base cabinets, where the back panel primarily adds rigidity, while wall cabinets often benefit from a slightly thicker back panel up to ½-inch since these cabinets hang from the wall and need additional support at the attachment points.
Attaching With a Nail Gun vs. Screws
A brad nailer or nail gun makes quick, clean work of attaching the back panel, driving fasteners along the perimeter into the side panels, bottom, and top braces.
Screws are a solid alternative if you don’t have access to a nail gun, offering a bit more holding strength, though they take noticeably longer to install across the full perimeter of the panel.
How the Back Panel Adds Structural Rigidity
Before the back panel goes on, a plywood box can flex and rack slightly out of square, even if it was cut and assembled precisely.
Once the back panel is attached, it locks the box into a fixed, square shape which is part of why getting your box square before this step matters so much.
Using the Back Panel for Wall-Mounting
For wall cabinets especially, the back panel (along with the top braces) provides the surface you’ll screw through into wall studs during final installation, making this component essential to how securely your finished cabinet hangs.
🔩 KEY TAKEAWAY
The back panel is more than a cover-it helps lock the cabinet box square and contributes to its overall rigidity.
5️⃣ Step 5: Building the Face Frame (If Applicable)
If you chose face frame cabinets back in Section III, this is where that traditional, finished look comes together.
If you’re building faceless cabinets, feel free to skip ahead to Step 6.
Constructing the Frame From Solid Wood
A face frame consists of vertical pieces (called stiles) and horizontal pieces (called rails), typically made from solid wood strips around 1.5 to 2 inches wide.
These pieces form a frame that matches the front opening dimensions of your plywood box, with the frame’s inner opening defining where your doors and drawers will eventually sit.
Attaching the Frame to the Plywood Box
Once your frame pieces are cut and joined into a complete frame, attach it to the front of your cabinet box using glue and finish nails, or pocket-hole screws driven from inside the cabinet where they won’t be visible on the finished piece.
Careful alignment here matters, since the face frame becomes the visible, defining feature of the entire cabinet front.
Face Frame Joinery Methods
The frame pieces themselves are typically joined using pocket holes (fast and beginner-friendly), or more traditional methods like mortise-and-tenon or dowel joints for builders with more woodworking experience seeking maximum strength and a more traditional construction approach.
Skipping This Step for Faceless Cabinets
If you’re building frameless, European-style cabinets, doors and drawers will attach directly to the plywood box edges instead, eliminating this entire step and the associated material and time it requires one of the clearest advantages of choosing the faceless style for a first build.
🪵 TIP
If you’re building frameless cabinets, skip this step and move directly to building your doors and drawers.
6️⃣ Step 6: Building Doors and Drawers
With your cabinet box (and face frame, if applicable) complete, it’s time to build the components that give cabinets their function: doors and drawers.
Constructing Simple Frame-and-Panel Doors
A traditional cabinet door consists of a frame again using rails and stiles, similar to a face frame surrounding a center panel, often plywood or a solid wood panel.
The panel typically floats within a groove cut into the frame pieces, allowing for slight natural wood movement without cracking the door over time.
Alternative: Slab/Flat-Panel Doors for Beginners
For a simpler, more modern approach, slab doors are just a single flat piece of plywood or MDF cut to size with no separate frame or panel construction required.
This is a significantly faster and more forgiving option for first-time builders, and it pairs naturally with the clean lines of faceless cabinet construction.
Building Drawer Boxes
Drawer boxes are typically constructed from ¾-inch plywood for the sides, front, and back, joined together at the corners (pocket holes work well here too), with a thinner plywood bottom often ⅜-inch glued and nailed directly to the underside of the box.
Attaching Drawer Bottoms
Cut a groove near the bottom edge of your drawer side pieces before assembly, allowing the thin plywood bottom to slide into place for a clean, strong joint or simply glue and nail the bottom flush to the underside of the assembled box, a faster though slightly less refined approach that works perfectly well for utility or workshop drawers.
🗄️ KEY TAKEAWAY
Slab doors offer a simpler option for beginners, while frame-and-panel doors provide a more traditional cabinet appearance.
7️⃣ Step 7: Installing Hardware
Hardware installation is where your cabinets go from static boxes to fully functional storage and it’s a step worth taking slowly, since misaligned hardware is one of the most visible flaws in an otherwise well-built cabinet.
Hinge Types and Installation
Concealed (European-style) hinges are a popular choice for their clean, hidden appearance and adjustability most allow for fine-tuning door alignment even after installation, which is genuinely helpful for a first build where small misalignments are common.
Traditional exposed hinges offer a more classic look, especially common on face frame cabinets, but generally offer less built-in adjustability.
Whichever type you choose, mark hinge placement carefully and consistently across all doors for a uniform look.
Drawer Slide Types and Installation
Side-mount slides are the most common, beginner-friendly option, attaching to the sides of both the drawer box and the cabinet interior; they’re straightforward to install and widely available.
Undermount slides offer a more refined, hidden look with smoother operation, but require more precise installation and typically cost more.
Whichever type you choose, ensure slides are mounted level and at matching heights on both sides to prevent a drawer from binding or sitting crooked.
Ensuring Proper Alignment and Smooth Operation
Test each door and drawer as you install hardware rather than waiting until everything is mounted catching an alignment issue early is far easier to fix than after several more components are in place.
Handles, Knobs, and Pulls
Finish with your chosen handles or knobs, measuring placement consistently across all doors and drawers for a cohesive, professional appearance.
🔧 IMPORTANT
Install and test hardware as you go. Small alignment problems are much easier to correct immediately.
8️⃣ Step 8: Sanding and Finishing
The finishing stage is what transforms a well-built cabinet into one that actually looks professionally made and it’s worth resisting the urge to rush through it after all the structural work is done.
🪵 Sanding Progression
Start with a coarser grit (around 120) to smooth any rough spots, mill marks, or minor imperfections, then progress to finer grits (180, then 220) for a smooth, even surface.
Sanding with the grain, rather than against it, helps avoid visible scratches that can show through paint or stain.
🎨 Priming Plywood Properly
Plywood surfaces, especially cut edges, which expose the layered structure benefit significantly from a quality primer before painting.
Primer helps seal the wood, provides a more even base for paint to adhere to, and can help minimize the visibility of plywood’s layered edge grain in the finished piece.
🖌️ Paint vs. Stain vs. Clear Sealant
| Finish | Main Benefit |
|---|---|
| Paint | Flexible color and hides plywood grain |
| Stain | Highlights natural wood grain |
| Clear sealant | Protects natural wood without adding color |
Paint offers the most flexibility for color and tends to hide plywood’s grain and edge layers most effectively, making it a popular choice for budget plywood like pine.
Stain highlights natural wood grain and works best with higher-quality plywood like maple or Baltic birch, where the grain itself is attractive.
A clear sealant (polyurethane or similar) protects natural wood without adding color, often used over stain or on naturally attractive wood species.
✨ Achieving a Professional-Looking Finish
Apply thin, even coats rather than one thick coat, sanding lightly between coats for a smoother final result.
Patience here allowing proper drying time between coats makes a bigger visible difference than almost any other single factor in the finishing process.
🎨 TIP
Don’t rush the finish. Thin, even coats and adequate drying time can make a major difference in the final appearance.
9️⃣ Step 9: Installing Your Cabinets
With your cabinets built and finished, the final step is putting them in place at a stage where precision matters just as much as it did during construction.
📏 Leveling Base Cabinets
Start with base cabinets, since wall cabinets and countertops will reference them.
Use a level across the top and front of each cabinet, adjusting with shims underneath as needed to correct for any unevenness in your floor.
Getting this right is essential, since an unlevel base cabinet throws off everything installed above and around it.
🔩 Anchoring to Wall Studs
Locate wall studs using a stud finder, then secure cabinets by screwing through the back panel and top braces (built in back during Section IX) directly into the studs.
Never rely on drywall alone to support cabinet weight; studs provide the structural strength needed to hold cabinets securely over years of use.
👥 Installing Upper Cabinets Safely
Wall cabinets are heavier and more awkward to hold in place than base cabinets, so consider using a temporary ledger board (a straight piece of wood screwed to the wall at the correct height) to support the cabinet’s weight while you secure it, or enlist a second person to help hold it steady during installation.
🔗 Connecting Adjacent Cabinet Units
Where cabinets sit side by side, clamp them together and screw through adjoining side panels or face frames to create a single, unified, more rigid structure rather than several independently wobbly units.
✅ Final Adjustments
Once installed, do a final check on all doors and drawers, making small hinge or slide adjustments as needed for even gaps and smooth operation.
⚠️ IMPORTANT
Never rely on drywall alone to support cabinets. Secure cabinets appropriately to structural support such as wall studs.
⚠️ Common Mistakes Beginners Make
Even a well-planned cabinet build can go sideways from a handful of recurring beginner errors.
Knowing what to watch for ahead of time can save real time, material, and frustration.
❌ Inaccurate Measurements/Cuts
This is the single most common issue in DIY cabinetry.
A cut that’s off by even an eighth of an inch can throw off how pieces fit together, especially once compounded across multiple components in a single cabinet.
Double-checking measurements before every cut, rather than trusting a single reading, prevents most of these errors.
❌ Skipping the Straight-Edge Guide
Free-handing cuts with a circular saw feels faster at the moment, but it consistently produces less accurate results than using a clamped straight-edge guide.
This shortcut is one of the most common sources of frustrating fit issues later in assembly.
❌ Using the Wrong Plywood Thickness
Substituting thinner plywood where structural ¾-inch material is needed often to save money can result in cabinets that flex, sag, or lack the rigidity needed to support weight over time, particularly for shelves and load-bearing components.
❌ Poor Hardware Installation
Rushing through hinge and drawer slide installation, or failing to test alignment as you go, often results in doors that don’t close flush or drawers that stick or sit crooked issues that are far easier to fix immediately than after everything is fully assembled.
❌ Rushing the Finishing Process
Skipping proper sanding, applying paint or stain too thickly, or not allowing adequate drying time between coats are common shortcuts that noticeably affect the final, visible quality of an otherwise well-built cabinet.
💡 KEY TAKEAWAY
Most beginner cabinet problems come from rushing measurements, cutting, assembly, hardware installation, or finishing.
💰 Cost Comparison: DIY vs. Pre-Made Cabinets
One of the most compelling reasons to build your own cabinets is cost but it helps to see the actual numbers side by side to understand just how significant the savings can be.
Typical Cost Breakdown for DIY Materials
A sheet of ¾-inch furniture-grade plywood generally runs somewhere in the range of $50 to $100 depending on the grade (pine on the lower end, Baltic birch or maple higher), and a single sheet can yield material for a meaningful portion of a cabinet box.
Factoring in hardware, thinner plywood for backs, and finishing supplies, most DIY builders report material costs landing well under $50 per linear foot of finished cabinetry, sometimes significantly less depending on material choices.
📊 Compared to Stock, Semi-Custom, and Custom Cabinet Pricing
| Cabinet Type | Typical Cost Range |
|---|---|
| DIY materials | Under $50 per linear foot |
| Stock cabinets | $60–$200 per linear foot installed |
| Semi-custom cabinets | $100–$650 per linear foot |
| Custom cabinets | $250–$1,200+ per linear foot |
Where DIY Offers the Most Savings
The gap is most dramatic against semi-custom and custom cabinetry, where DIY materials alone often cost a small fraction of installed pricing, the tradeoff being your own time and labor instead of paying a professional’s.
Where It May Not Be Worth the Time Investment
If your time is extremely limited, or your kitchen has a complex layout, DIY may close less of the gap against affordable stock cabinets, where professional installation and manufacturing efficiency narrow the price difference.
💰 KEY TAKEAWAY
DIY cabinets can reduce material costs compared with many pre-made options, but remember to account for your time, tools, hardware, finishing supplies, and installation.
✨ Customization Ideas
One of the biggest advantages of building your own cabinets is the freedom to customize them exactly to your needs, something pre-made cabinetry, even semi-custom options, often can’t fully replicate.
🗄️ Built-In Organizers and Inserts
Since you’re building from scratch, you can design interior features tailored to what you’ll actually store: pull-out trash bins, spice rack inserts, tiered shelving for pots and pans, or dedicated dividers for baking sheets and cutting boards.
These features are often expensive add-ons with pre-made cabinetry but relatively simple to incorporate into a DIY build from the start.
🤫 Soft-Close Hinges and Slides
Upgrading to soft-close hinges and drawer slides is a small hardware investment that meaningfully elevates the everyday feel of your finished cabinets, eliminating slamming doors and drawers.
Since you’re sourcing hardware yourself, this upgrade is easy to include without the premium pricing often attached to soft-close as an “upgrade” option through cabinet retailers.
📐 Custom Sizing for Awkward Spaces
Odd angles, uneven walls, or unusually shaped nooks are notoriously difficult to fit with stock cabinetry.
Building your own cabinets means you can design pieces that fit these spaces precisely, rather than settling for a filler panel or an awkward gap.
🎨 Mixing Materials/Finishes for a Unique Look
DIY building also opens the door to combining materials in ways pre-made lines rarely offer pairing open shelving with closed cabinetry, mixing a painted finish with natural wood accents, or incorporating reclaimed or specialty wood for a genuinely one-of-a-kind result that reflects your specific taste rather than a manufacturer’s standard offerings.
✨ TIP
DIY cabinetry gives you control over storage, dimensions, hardware, materials, and finishes, allowing the final design to match your specific needs.
❓ FAQs About Building Cabinets
How Much Does It Cost to Build Your Own Kitchen Cabinets?
DIY cabinet materials typically cost well under $50 per linear foot, compared to 60–1,200+ per linear foot for pre-made stock, semi-custom, or custom cabinets is often a fraction of the price, minus your own labor and time.
What Is the Best Plywood for Building Cabinets?
¾-inch furniture-grade plywood is the standard choice. Baltic birch and maple offer the most durable, attractive results, while pine plywood is a solid budget option for painted finishes.
Can a Beginner Build Their Own Cabinets?
Yes. With careful measuring, a straight-edge guide for clean cuts, and pocket-hole joinery, building cabinets is genuinely achievable for first-time DIYers with no advanced woodworking skills required.
What Tools Do I Need to Build Cabinets?
At minimum: a circular saw or table saw, a drill/driver, measuring tools, and clamps. A pocket-hole jig and straight-edge guide make the process significantly easier for beginners.
Is It Cheaper to Build Your Own Cabinets Than Buy Them?
Almost always, yes especially compared to semi-custom or custom cabinetry, where DIY material costs can be a small fraction of installed retail pricing.
What’s the Difference Between Face Frame and Frameless Cabinets?
Face frame cabinets have a solid wood frame across the front opening (more traditional); frameless (European-style) cabinets skip the frame entirely and are generally easier and faster to build.
How Do You Build a Cabinet Box Step by Step?
Cut plywood to size, build the toe kick base, assemble the box (sides, bottom, top braces), attach the back panel, then add doors, drawers, and hardware.
What Is the Standard Depth for Kitchen Base and Wall Cabinets?
Base cabinets are typically 24 inches deep; wall (upper) cabinets are typically 12 inches deep, though this can vary by design.
📌 QUICK ANSWER
The basic cabinet-building process is: plan → measure → cut plywood → build the base → assemble the box → attach the back panel → build doors and drawers → install hardware → finish → install the cabinets.
🏁 Conclusion
Building your own cabinets is a project that rewards patience, careful planning, and methodical execution far more than advanced woodworking talent.
From measuring your space and choosing between face frame or faceless construction, through cutting, assembling, and finishing your plywood boxes, to installing doors, drawers, and hardware, each step builds on the one before it which is exactly why getting the early stages right (accurate measurements, square cuts, a solid box) pays off throughout the entire process.
The payoff extends well beyond the satisfaction of building something yourself.
Custom-fit cabinetry designed exactly for your space, built-in organization tailored to how you actually live, and often significant cost savings compared to stock, semi-custom, or fully custom pre-made options make this one of the more genuinely worthwhile DIY projects a homeowner can take on.
That said, it’s worth being realistic about the time investment.
This isn’t a weekend project for a full kitchen but it’s also far more achievable than it might seem from the outside, especially if you start with a smaller project, like a single vanity or a garage storage cabinet, before tackling a full kitchen remodel.
🪚 FINAL KEY TAKEAWAY
Accurate measuring, square cuts, and patient assembly are the fundamentals that make DIY cabinet building achievable.